前言
本文介绍使用 afl 来 fuzzing x86 架构之外的程序环境的搭建,以及安装 afl 的必要组件来构建环境搭建的步骤。主要归纳搭建 AFL qemu 模式、AFL unicorn 模式、qiling 框架的方法步骤和纪录一下搭建过程中的一些坑。
x86 架构下的 fuzzing 环境
x86 架构的 afl 安装和使用都比较简单,直接 git clone 项目到本地即可使用。
1 | https://github.com/google/AFL |
安装:
1 | make && make install |
有源码情况下的 fuzzing
目标程序有源码的情况下使用 AFL 进行 fuzzing 的步骤:
1 . 源码编译出目标程序
1 | #include <stdio.h> |
2 . 开始 fuzzing
1 | afl-fuzz -i in/ -o out/ -m none ./test @@ |
无源码情况下的 fuzzing
无源码的情况下可以使用 qemu 模式来 fuzzing ,需要加上 -Q (qemu 模式)参数:
1 | gcc test.c -o test |
这种方法需要安装一些环境,具体步骤在下文中有相应的步骤体现。
MIPS 架构 fuzzing 环境搭建
自己改的一个支持 fuzzing mips 架构的 afl,修复了一些错误。将 qemu-2.10.0.tar.gz、mips 的 libc.so.0 和 ld.so 文件 分别打包到了 qemu_mode、mips_lib/ 目录。
1 | https://gitee.com/h4lo1/afl-other-arch |
增加了一处 patch 在 glibc-2.27 下编译 qemu 的错误:
1 | --- a/util/memfd.c |
安装方法
官方介绍的方法:
This is a simple patch to AFL to make other-arch (non-x86 based) support easy. Just run ./build.sh
to get started, where can be one or more of
这里以 mips 大端架构为例子,首先使用 qemu 编译出 mips 的环境:
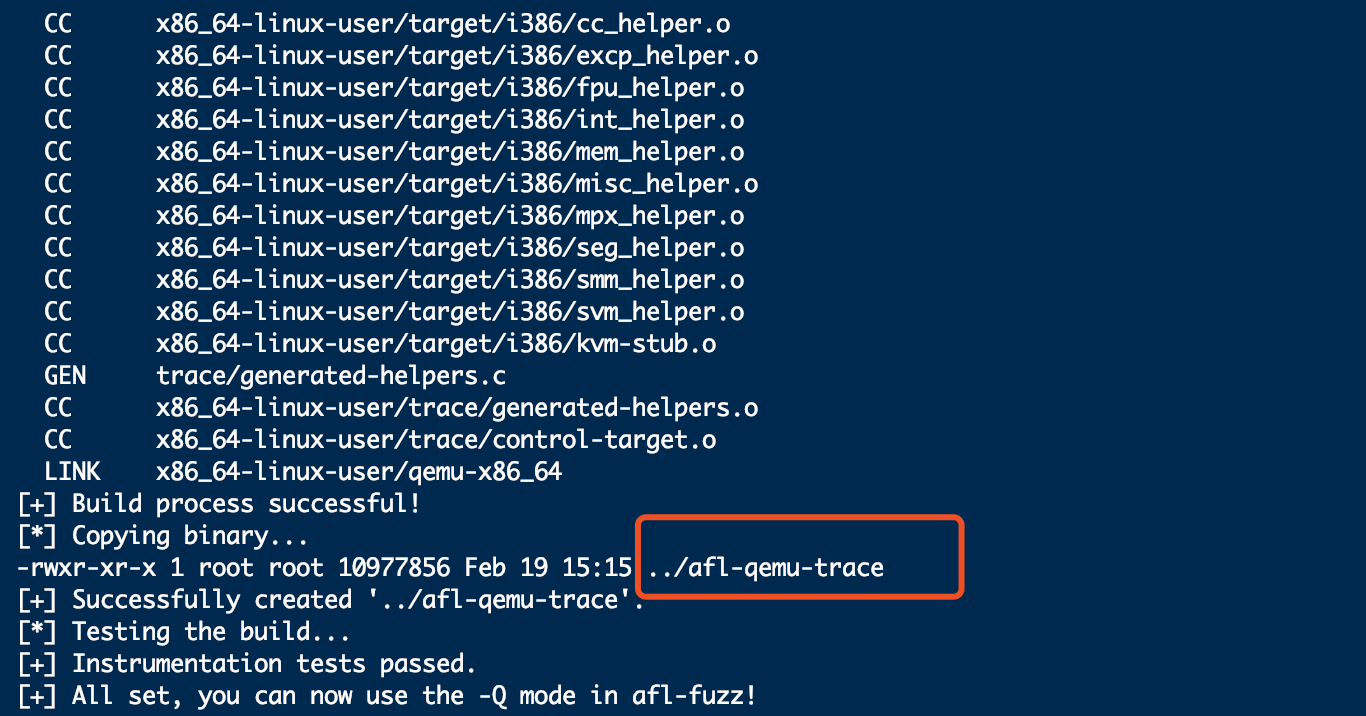
1 | ./build.sh mips |
这里编译完成之后会在上一级目录下生成 afl-qemu-trace 这个文件,这个文件其实就是编译好的 qemu-mips。
这里如果直接跑: ./afl-fuzz -i fuzz_in/ -o fuzz_out/ -Q -m none -- ./test @@ 可能会报错(原因是没有找到相应的 lib 动态库的路径):
- 这里的 test 可执行文件是 mips 架构的动态链接程序,如果对使用
gcc --static命令编译的静态链接的 mips 程序进行 fuzzing 就不会出错。
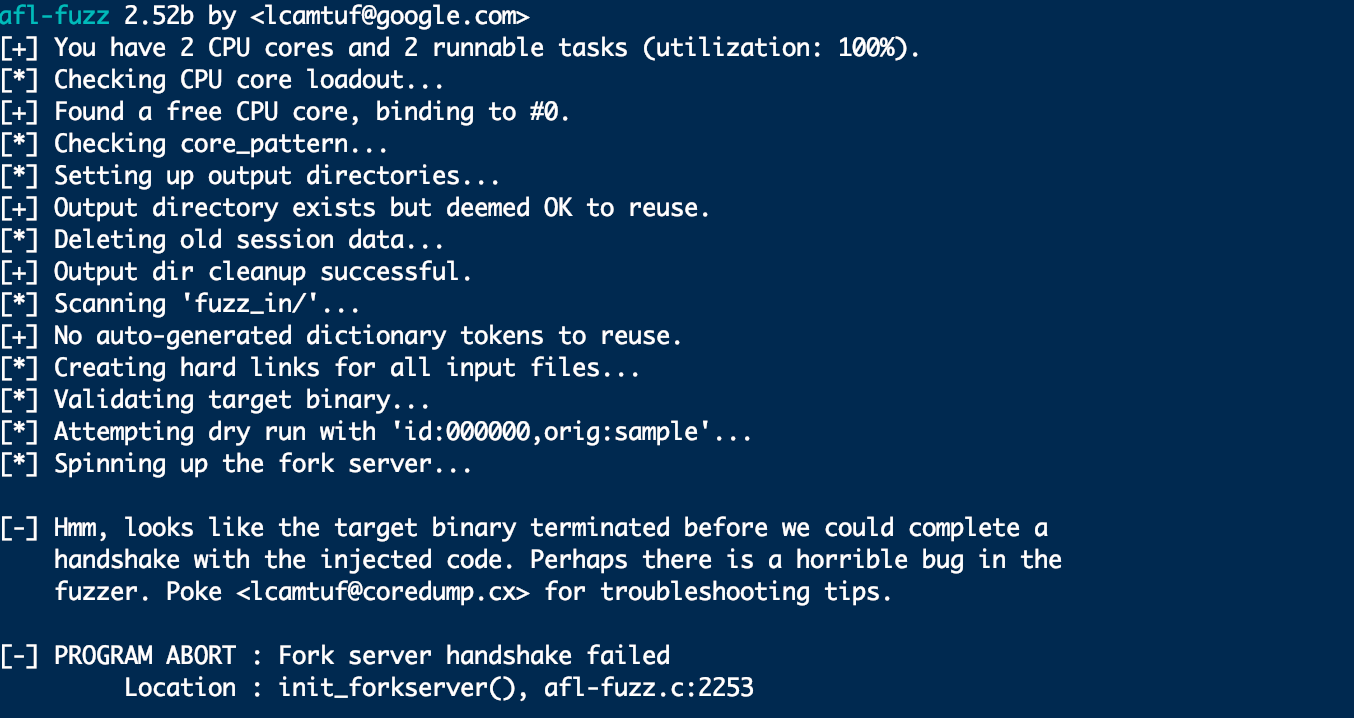
上图中还是出现了错误的原因如下:
这里还需要设置 QEMU_LD_PREFI 这个环境变量,也就是 mips 的 lib/ 目录所在的目录,见下图:
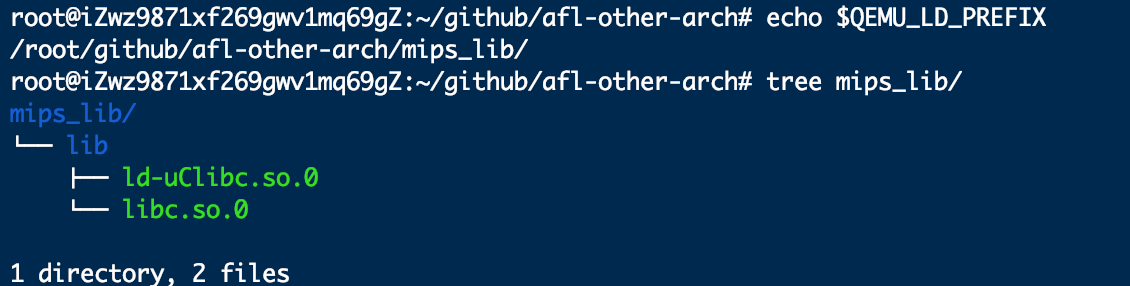
- 这两个 so 文件可以自己从已有的 mips 架构设备固件的文件系统根目录下取出,也可以直接指定
QEMU_LD_PREFI的值为设备固件文件系统的根目录。 - 注意:这里的库文件的文件名不能更改,否则会出错。
或者这里可以使用 apt search mips | grep libc6-mips-cross 来安装 libc 库,下载好的目录位于 /usr/ 目录下:

然后再重新指定 QEMU_LD_PREFI 变量为相应的目录即可。
1 | export QEMU_LD_PREFI=`mips_lib_path` |
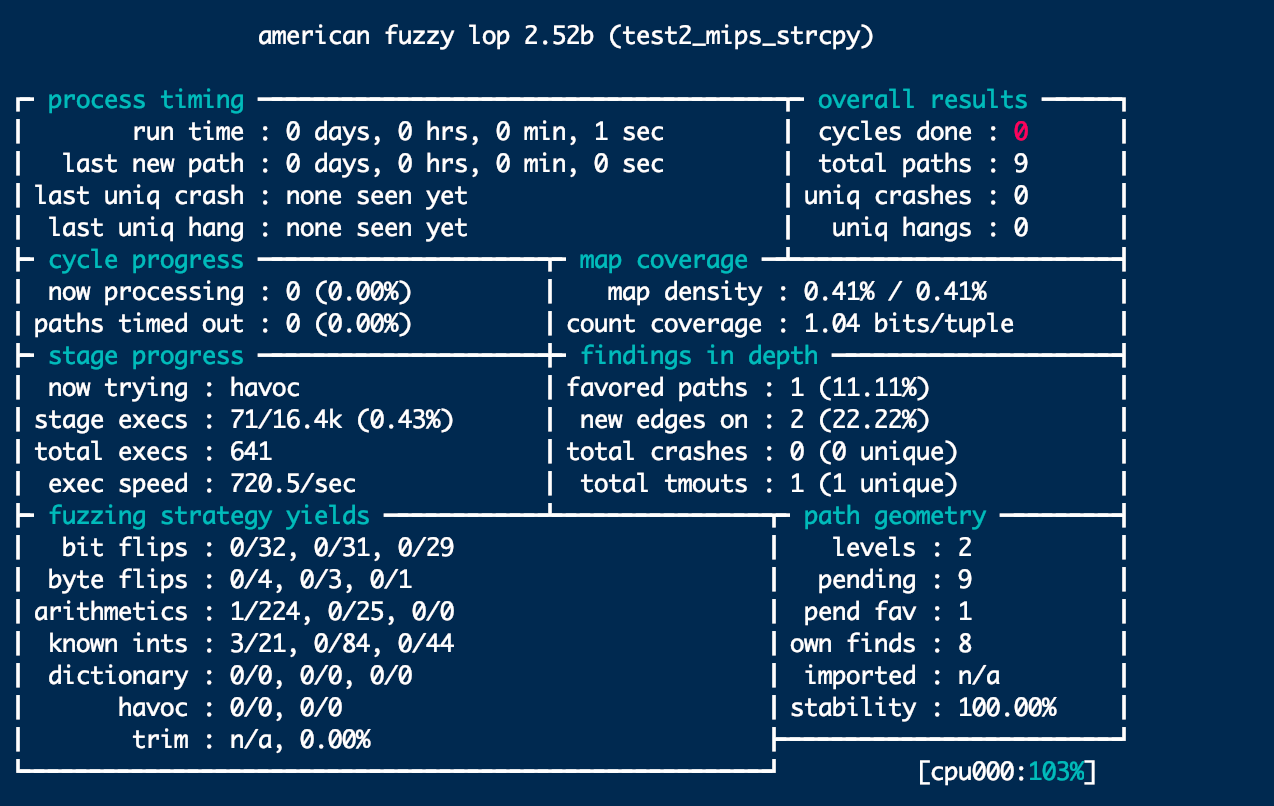
这时就可以成功 fuzzing 动态链接的 mips 程序:
1 | ./afl-fuzz -i fuzz_in/ -o fuzz_out/ -Q -m none -- ./test @@ |
安装 AFL unicorn 模式
AFL++ 仓库
git clone 项目:
1 | git clone https://gitee.com/h4lo1/AFLplusplus.git |
安装必要的支持库:
1 | apt-get install libgtk2.0-dev bison libtool libtool-bin |
同 AFL 的编译和安装步骤:
1 | sudo make -j8 |
查看相应的版本,是 2.60d 版本的就说明安装正确:
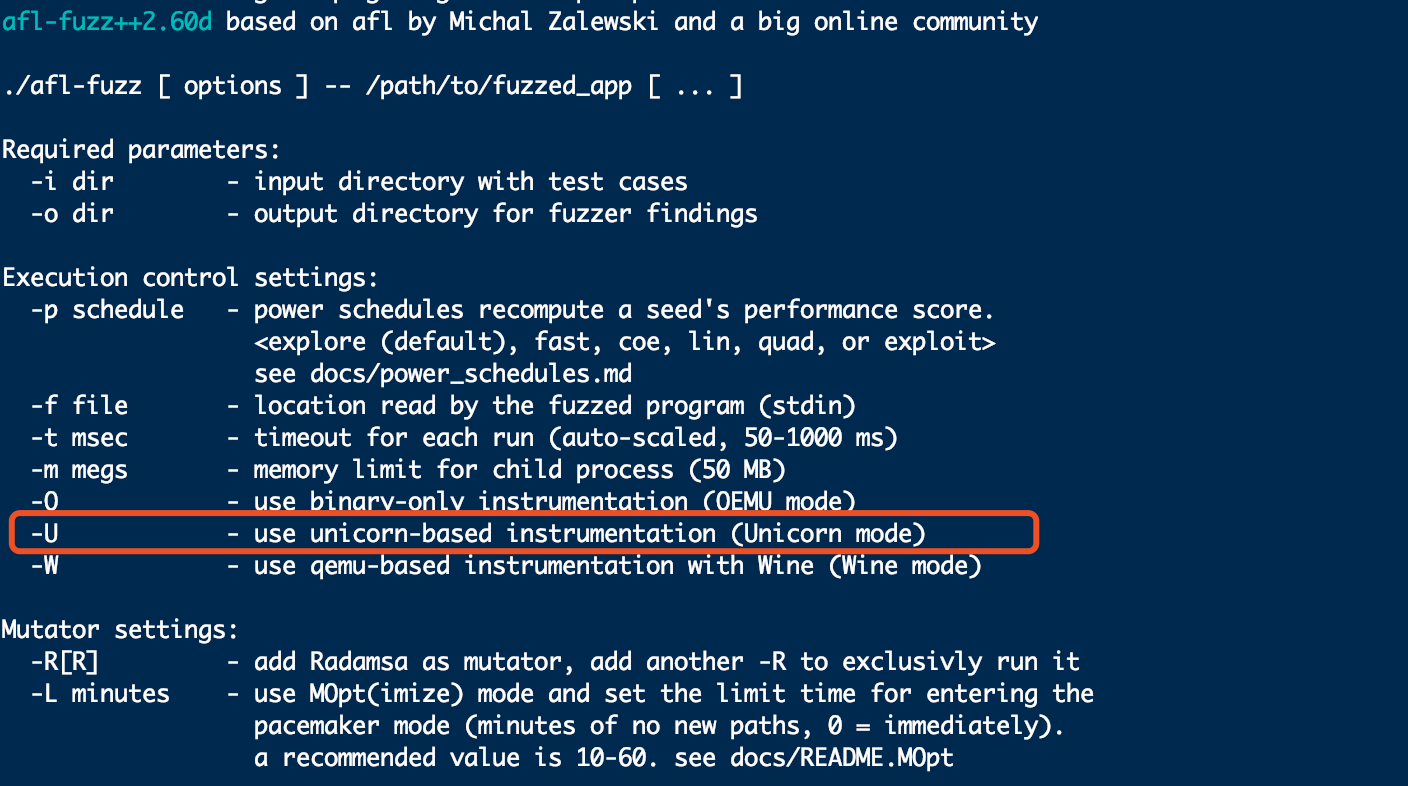
unicornafl
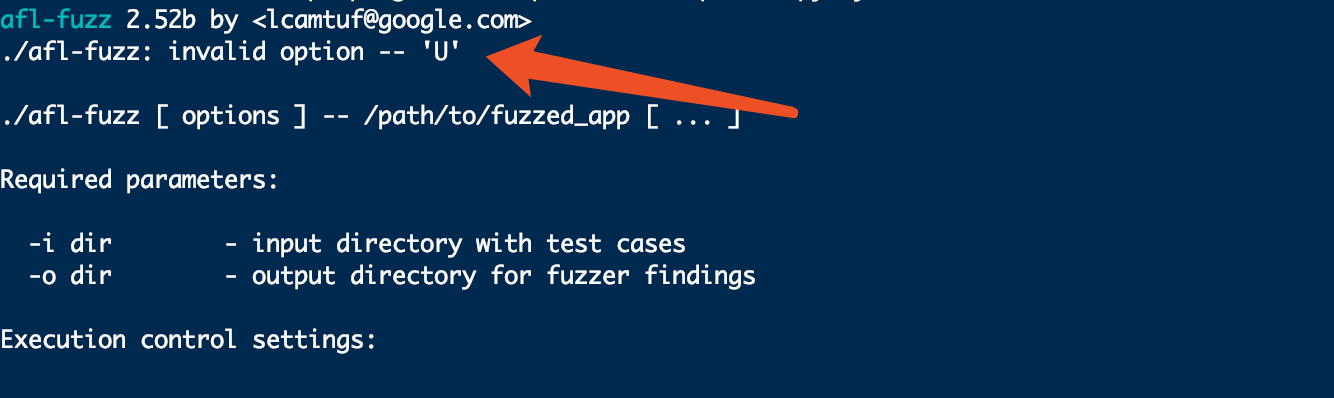
为了使 afl 支持 -U 参数的模式,还需要安装 unicornafl,前提是要安装好 AFL++ 这个工具。
如果直接安装官方的 afl-fuzz 2.52b 版本的话,会提示没有 -U 这个参数,所以就需要提前安装好 AFL++。
安装步骤:
1 . git clone unicornafl :
1 | https://gitee.com/h4lo1/unicorn--afl |
2 . 编译:
1 | make -j8 |
3 . 安装:
1 | cd ./bindings/python |
如果在 python 中 import uncornafl 没问题的话,就说明安装成功。

- 因为下面要说的 qiling 框架只支持 python3,所以最好使用 python3 来编译这个模块。
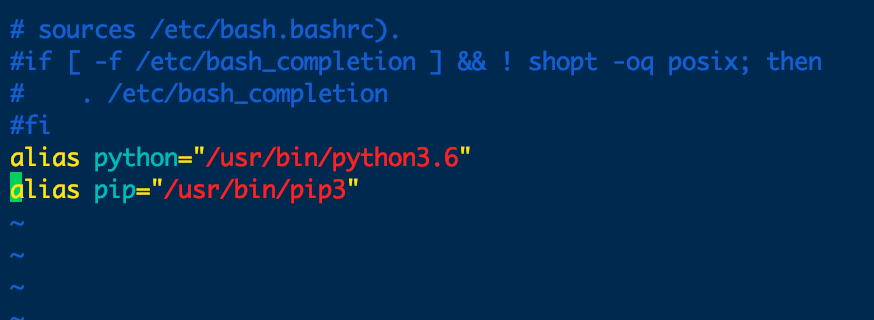
设置默认 python 环境为 python3 的方法:
在 ~/.bashrc 文件最末尾加入下面两句话即可,分别为 python3 和 pip3 在系统下的绝对路径:
1 | alias python="/usr/bin/python3.6" |
之后 source ~/.bashrc 即可。
- 或者要安装 unicornafl 组件的话,这里可以直接在 AFL++ 的 unicorn_mode 目录下,运行
build_unicorn_support.sh可执行文件即可。

使用 qiling-afl fuzzing mips 程序
- qiling 框架是一个二进制分析框架,针对于框架的学习参考官方项目的 README。
官方的介绍:
麒麟框架不仅仅是一个仿真平台或逆向工程工具。它还将“二进制插桩”和“二进制仿真”结合一起。借助麒麟框架,你可以:
- 动态干预二进制程序执行流程
- 在二进制程序执行期间对其进行动态补丁
- 在二进制程序执行期间对其进行代码注入
- 局部执行二进制程序,而不是运行整个文件
- 任意补丁“脱壳”已加壳程序内容
安装方法
首先安装带有 unicornafl 的 qiling 框架,同样直接 git clone 即可:
1 | git clone https://gitee.com/h4lo1/qiling-unicornafl |
clone 完成后,进入到 afl/ 目录下,对 fuzz_x8664_linux.py 进行 fuzzing。
1 | /root/github/AFLplusplus/afl-fuzz -i ./afl_inputs -o ./afl_outputs -m none -U -- python3 ./fuzz_x8664_linux.py @@ |
使用 afl-unicorn 框架 fuzzing mips 程序
afl-unicorn 框架也是一个可以 fuzzing 多架构的指令集的 afl 集成框架。关于该工具的介绍可以参考这篇文章。
- 该工具的优势是还可以 fuzzing 一些裸机系统的指令代码,如 RTOS 系统,可以参考这篇文章。
安装方法:
git clone 项目到本地:
1 | git clone https://gitee.com/h4lo1/Afl_unicorn.git |
编译 unicorn:
1 | cd Afl_unicorn/unicorn_mode |
如果编译完成没有问题的话,会提示下面的语句:
1 | [+] All set, you can now use Unicorn mode (-U) in afl-fuzz! |
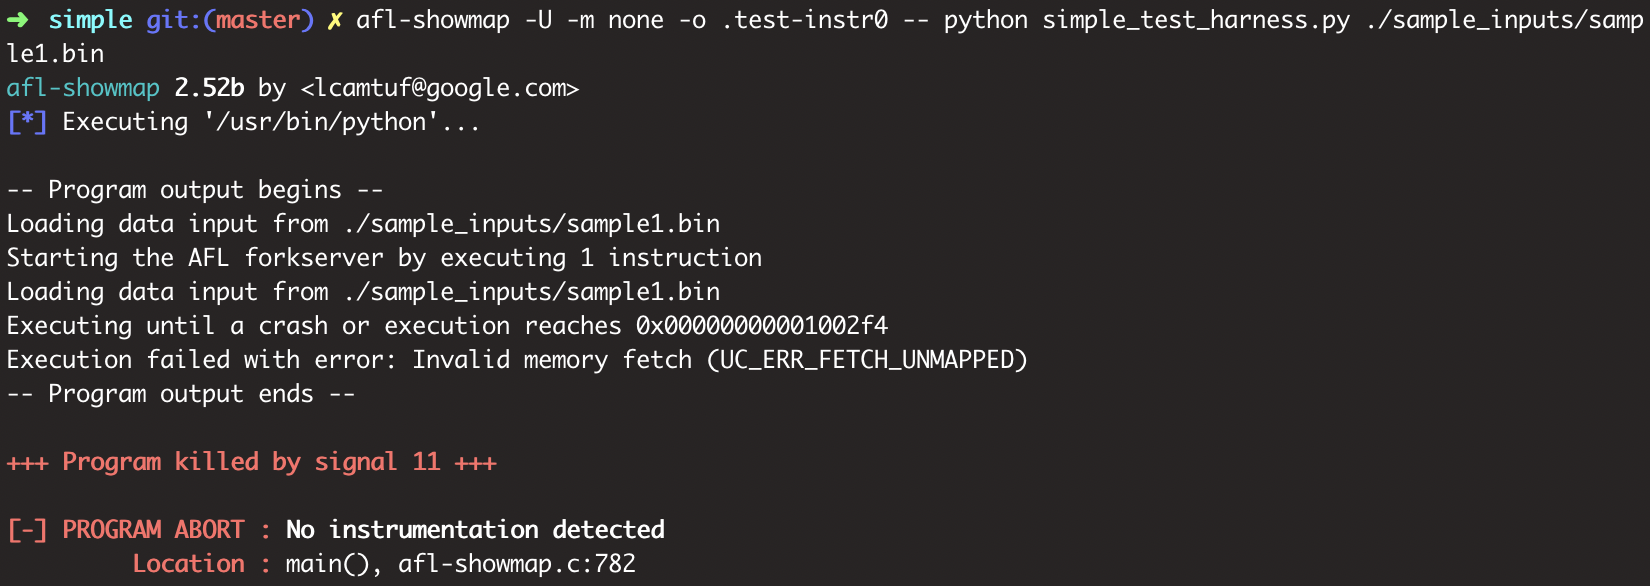
- 笔者在 Ubuntu 16.04 测试没问题,但是在 ubuntu 18.04 上怎么都安装不上。。。
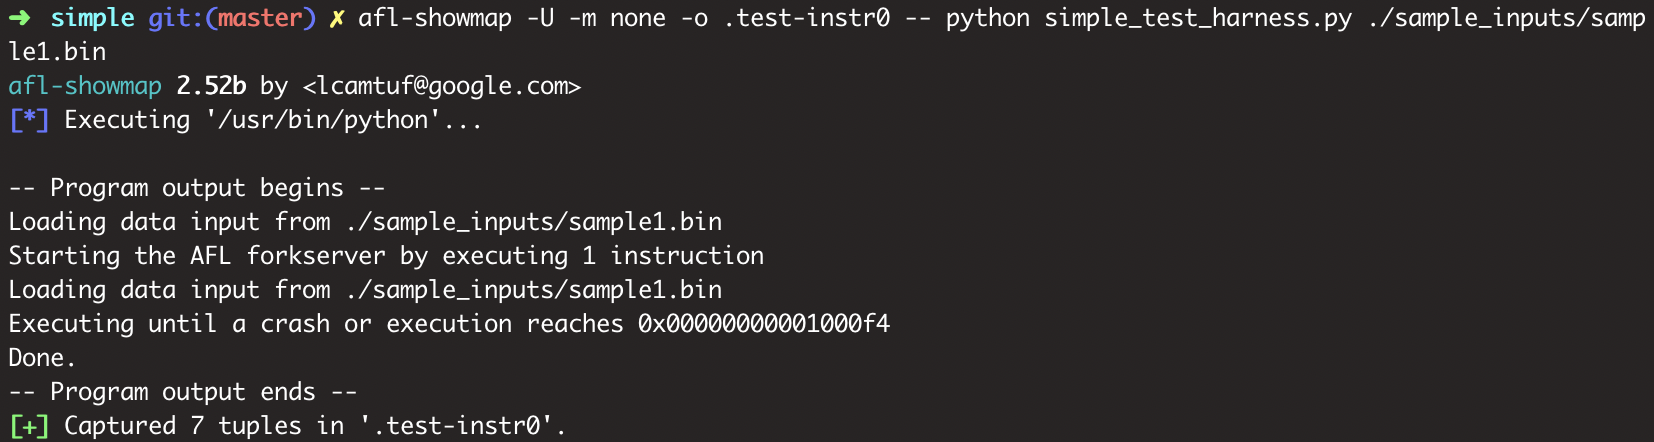
这里可以使用下面的命令测试能否跑起来:
1 | cd samples/simple |
如果出现下面的提示就表示没问题:
在 18.04 上会提示失败原因如: No instrumentation detected,估计和 unicorn 组件有关:
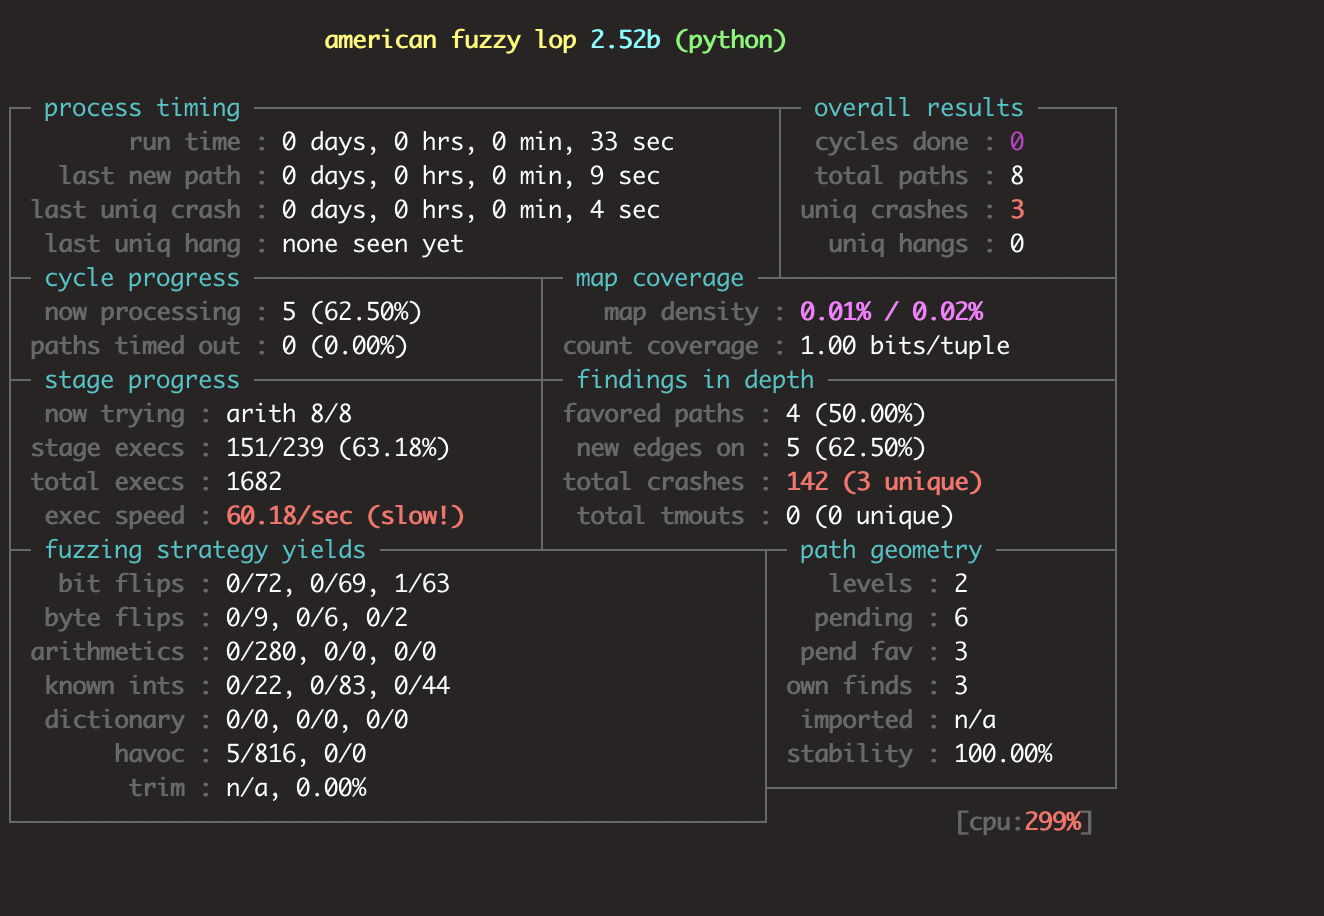
运行界面:
待解决的问题
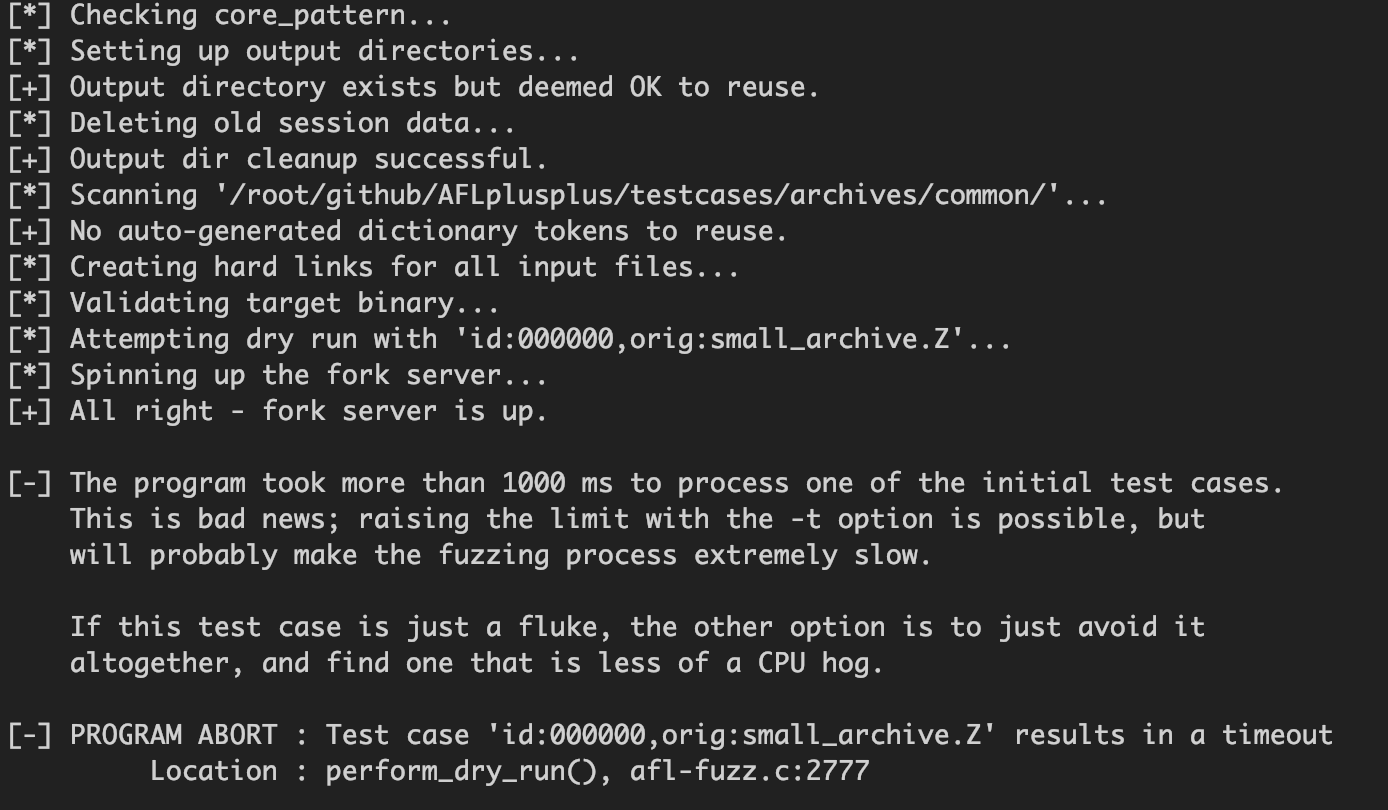
对于 MIPS 某些程序,还是会提示处理用例超时?
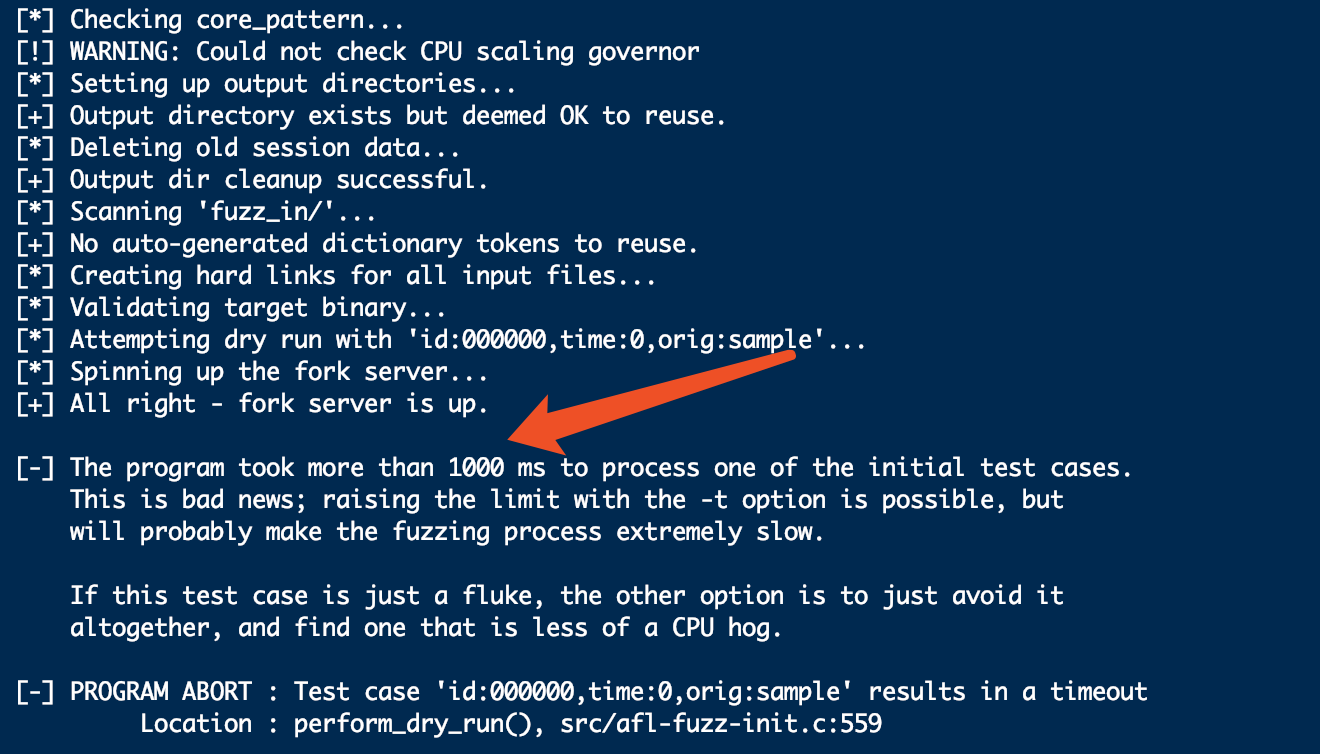
再如:
参考文章
AFL(二)afl-qemu无源码fuzz
深入分析 afl / qemu-mode(qemu模式) / afl-unicorn 编译及安装存在的问题以及相应的解决方案